Leak Testing
You conserve water, take shorter showers, check faucets for drips and use water saving appliances... so why is your bill higher this month?
The most common reason is a 'silent leak'. Usually a toilet that is slowly leaking and therefore not making any noise. In fact without the rise in usage showing on your utility bill, you might never know it was there.
There are some simple steps you can take to check for this particular problem. The first is a quick visual inspection. Does the handle stick when you flush? Next, lift the lid from the tank at the back of the toilet and take a look: you don't need to be familiar with the workings of the tank to be able to see if there is water slowly running in from the refill tube. Is the flapper (the rubber plug at the bottom of the tank) properly fitting over the hole it is supposed to cover?
If you see any problems in the tank you can often fix them yourself, or it is an inexpensive fix for a plumber.
To learn more about the workings of your toilet and find diagrams for reference, everything you ever wanted to know and more can be found here: Wikipedia- Flush Toilets If the visual check doesn't turn up anything obvious there are a couple more tricks you can try:
The food coloring test:
1) Put some food coloring into the tank.
2) Wait at least 3 to 4 hours and see if the water in the bowl changes color.
If so, the flapper valve is the problem.
3) Check more than once: the flapper valve may seat properly some of the time, but not all of the time.
The pencil line test:
1) Draw a pencil line on the back wall of the tank on the inside of the tank at the waterline.
2) Turn the water supply off, either under the tank or at the main shutoff.
3) Wait 20 to 30 minutes.
If the water level remains at the pencil mark, the leak is occurring in the 'Refill Valve'. If the water level falls below the pencil mark, the leak is occurring in the 'Flush Valve.'
Other leaks to watch out for:
Leaky Faucets... The obvious sign is a constant 'drip, drip, drip'! Make sure to check your sink and bathtub faucets as well as appliance connections. Replacing the rubber O-ring or washer inside the valve can usually repair dripping faucets, quickly, easily and cost effectively.
Landscape irrigation defects may also cause water leaks. Normally this will occur when sprinklers are running. There may be a break in the line or a damage to one or more of the sprinkler heads. Check to see if some area of your landscaping remain wet even when the sprinklers have not been on.
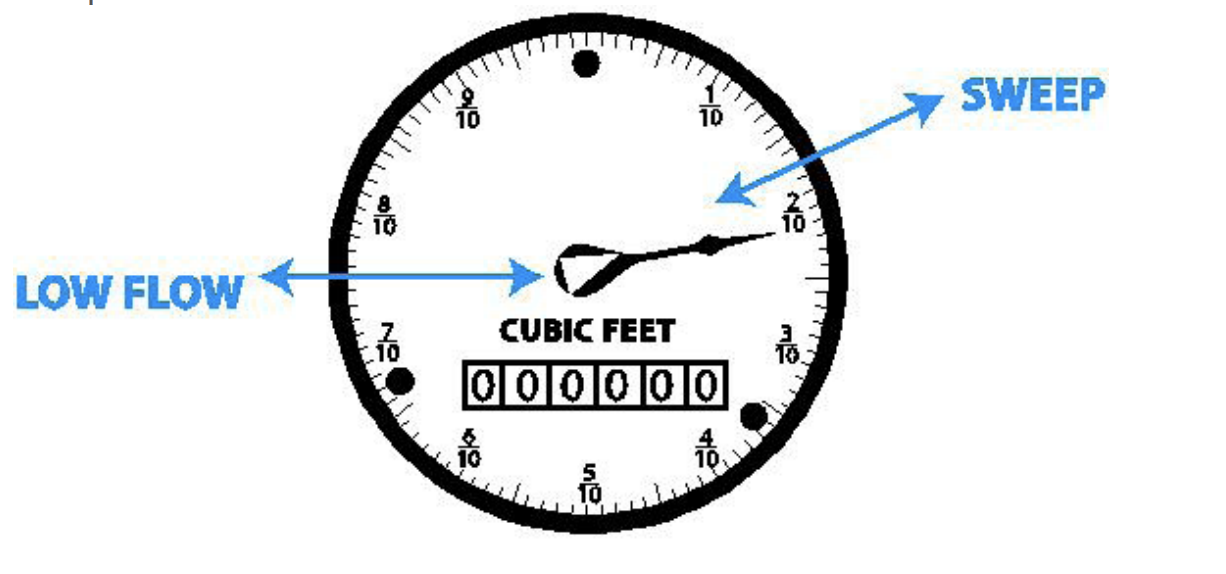
Using your meter to check for leaks:
To check for a leak it is important to first turn off all water in the house. (Note: If you have an icemaker or some other device that automatically turns water on, it will be detected at the water meter.)
Locate your physical meter, not the electronic reader or wall pad, and look for and a red or white triangle; this is the low flow indicator. If this triangle is constantly moving then you have a leak.
For more information on how to read your meter, check here.
if you determine that there is a leak or slow leak, the next thing to do is to call in a plumber to help fix it. If you don't identify a leak, try calling to help troubleshoot at 760-728-1295, press 1 for Customer Service, and then press 7.
Download Document